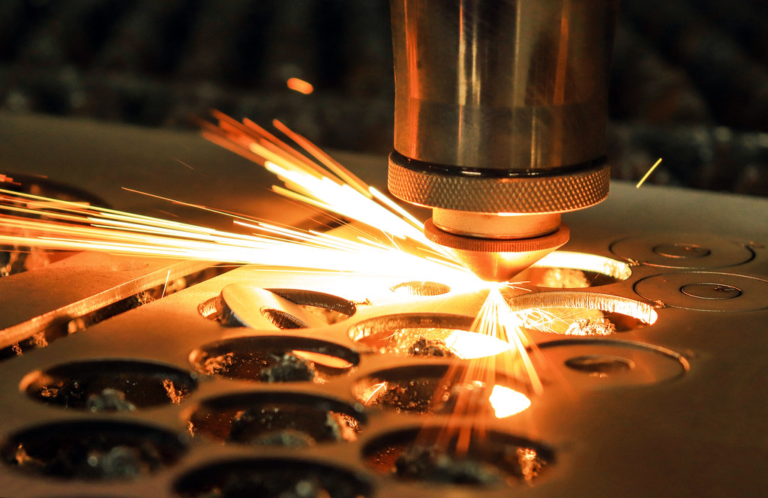
What is FDM 3D printing?How do 3D printers work? — Simply Explained with Anatomy & GIF Images

Facebook
Twitter
LinkedIn
Reddit

What is FDM 3D printing?

FDM is short for fused deposition modeling. As one most popular additive manufacturing technology, FDM 3D printing refers to the manufacturing process of adding thermoplastic materials layer by layer to create three-dimensional objects in accordance with a computer 3D modeling file. The FDM 3D printing technology was first invented by Scott Crump in 1988 who then founded the “Stratasys” company in the next year and in 1991 Stratasys launched the world’s 1st FDM 3D printer.
FDM 3D Printing Technology
Compared with the traditional subtractive manufacturing methods, FDM 3D printing uses additive manufacturing methods which takes only required materials to create 3D objects instead of removing & casting off unnecessary materials from original molds. In this term, the FDM printer is considered as one more sustainable manufacturing method.

FDM 3d Printer Anatomy & Diagram

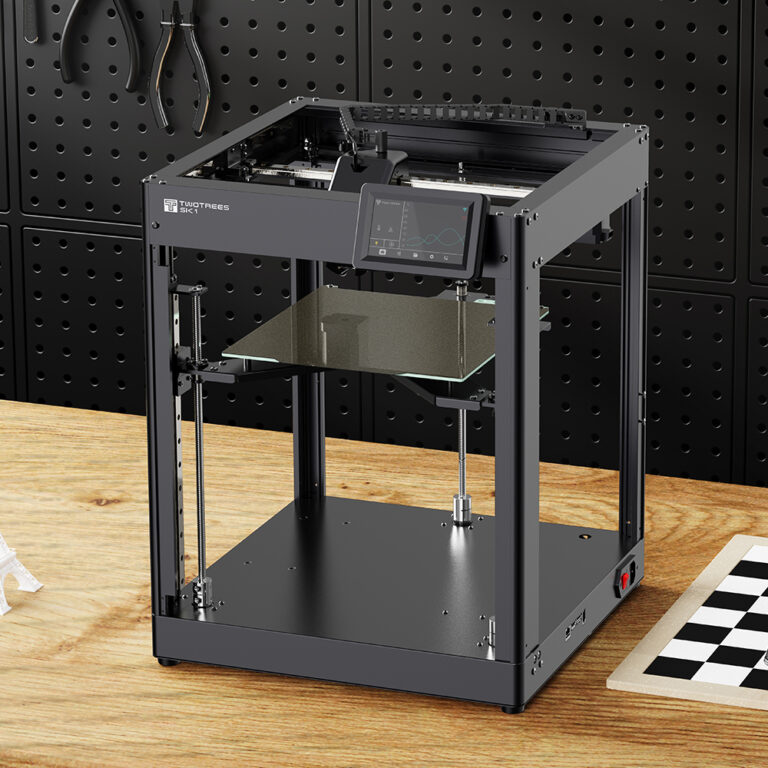
Before looking into how does an FDM 3D printer works, it’s important to know how it looks like and what are some important parts and components of an FDM printer. Here is an anatomy diagram for a standard cartesian FDM 3D printer.
FDM 3d Printer Anatomy & Diagram
1. X-axis – The left and right motions move along the X-axis. 1a is the X-axis motor
2. Y-axis – The forward and backward motions move along the Y-axis. The print hotbed usually will move along the Y-axis. 2a is the Y-axis motor.
3. Z-axis – The up and down motions move along the Z-axis. Z-axis motor – Behind the frame
4. Print Bed– This is the surface where the print will be built on. The print bed surface can be made of a variety of materials that help the print stick to the bed. PEI is a common material that can be added to the print bed and helps with adhesion. There are also more premium print surfaces such as FilaPrint by FilaFarm that benefits from the easy removal of prints.
5. Touch Screen Controller – This is the brain of the printer. It is usually where the interface for controlling the printer is and where all the other parts are plugged into. 3D printers have many kinds of firmware that can run on them. One of the most popular is Marlin.
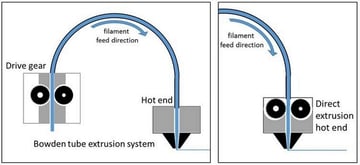
6. Extruder – This is how the filament gets pushed into the nozzle for printing. There is a motor with a gear that turns and slowly pushes filament into the Hotend. There are many kinds of extruders that hold different properties such as the Flexion extruder that is specially designed for flexible filament. Extruders can come in 2 styles: Bowden or direct drive. 6a is the Extruder Motor.
Direct Extrusion & Remote Extrusion
– Direct Drive: extruder driver is set in printhead for faster response, more accuracy, less energy consumption and wider option for filaments. However, it also has some cons including heavier printhead, more vibration, less accuracy, more difficulty for maintenance.
– Bowden Driver: extruder drive is fixed on the frame.
7. Bowden tube – This is the tube that has filament running through it. This only applies to setups with a Bowden-style extruder.
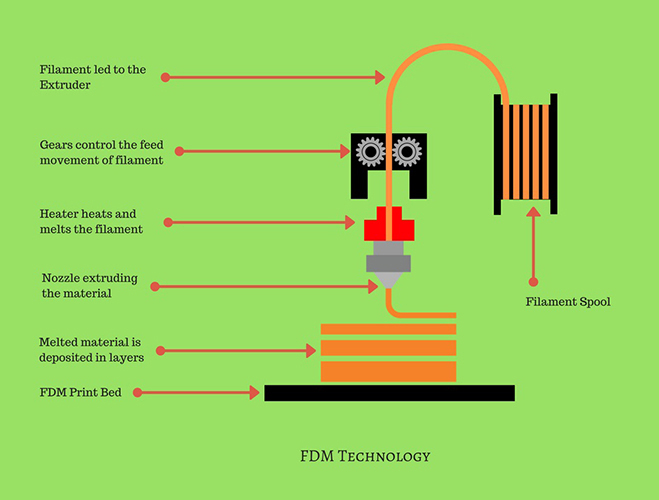
8. Hotend – The hotend assembly is where the plastic melts so it can be deposited onto the print. The hotend is comprised of a few parts.
a–Nozzle – The nozzle gets hot and melts the filament. The nozzle is connected to the heater block. It comes in many sizes ranging from 0.1mm to as much as 2mm or beyond depending on the application. The typical size is 0.4mm. The nozzle can be swapped out for other sizes as needed.
b–Heater block – The heater block is where the heater cartridge is connected. There may or may not be insulation around the block. Insulation helps with preventing heat fluctuation.
c–Heater Cartridge – The heater cartridge runs through the heater block as the source of heat for the hotend.
d–Thermistor – The thermistor is positioned just inside the heater block and reads the temperature of the hotend.
e–Heat Break and Heat Sink- The heat break is the portion of the hotend that needs to be cooled in order to prevent the heat from the heater block from traveling too far up the hotend. Ideally, the heat should be isolated to where the plastic is melting. Softening of the filament too far up the hotend will cause clogging.
FDM 3D Printing Diagram
f–Cooling fan – The cooling fan cools the heat break.
g–Part cooling fan – The part cooling fan quickly cools the material that has just been deposited. Not all printers have this and it is not always required. The requirement depends on the material being used. For example, PLA filament benefits greatly from being cooled quickly as opposed to ABS filament which may warp if cooled too quickly.
9. End stops/Limit switches – End stops mark the home position of each axis. When homing the printer (moving the axes to their home position), each axis will move towards these ends stops. Once it reaches the end stop, the movement of that axis will stop. This tells the printer that the axis has reached its home position.
10. Extras – these parts are not required but they are becoming more commonplace.
a– Auto level sensor – Auto level sensors are completely optional and they come in many different forms. Sometimes it will be used in place of an end stop for the Z-axis. This sensor is used to measure where the low and high points are on the bed so that the printer can compensate for the differences. This allows the printer to print on the surface evenly even if the bed is uneven. This can eliminate the need to level the bed manually. An example of such a device is the wildly popular BLTouch by ANTCLABS.
b– Filament sensor – This unit detects when the filament runs out and pauses the print.

How Does A FDM 3D Printer Work Explained with Gif

Step One: 3D Modeling

After setting up your 3D printers, the real challenge for beginners shows up: what to print with. To get printing started, the first thing to do would get a 3D printer file/mode (STL is the most popular file format). For users without knowledge to build 3D models by themselves, the easy solution would be sourcing free STL 3D printing files from websites like Thingiverse or Cult.

3D Modeling For FDM 3D Printers

Step Two: 3D Model Slicing

As mentioned in FDM 3D printing definition, the printers need a computer file to tell it how to move its printing nozzle and printing hotbed. The slicing file basically does this job as it tells printers two-dimensional images of each layer, filaments thickness applied to each layer and the gap distance between each layer. If you already get a 3D modeling file at hand, there are a few popular slicing software to help you slice the 3D model file (STL file) into sliced one(usually in GCode format).
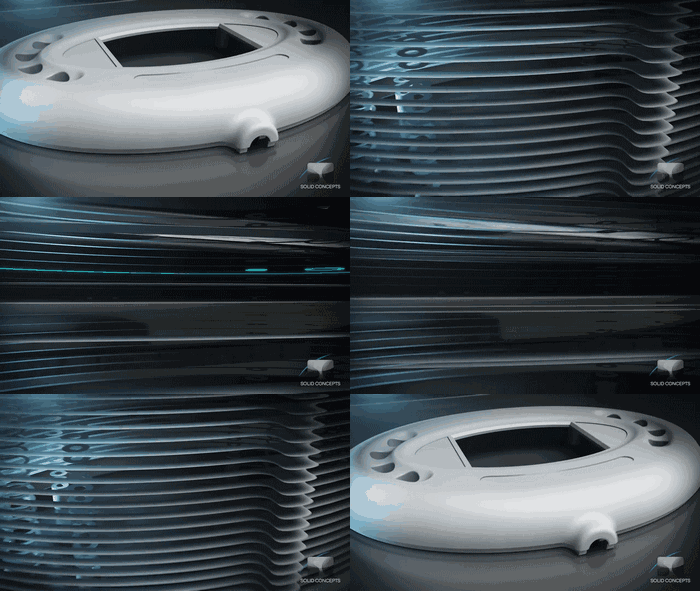
3D Model Slicing
3D Model Slicing File

Step Three: FDM 3D Filaments Extrusion

Before starting printing, users need to turn on 3D printers for pre-heating to make the printing nozzle and hotbed temperature reach configured temperature. When the temperature reaches the pre-set temperatures, filaments would be pushed from the filaments holder forwarder to the printing nozzle for melting and printing.
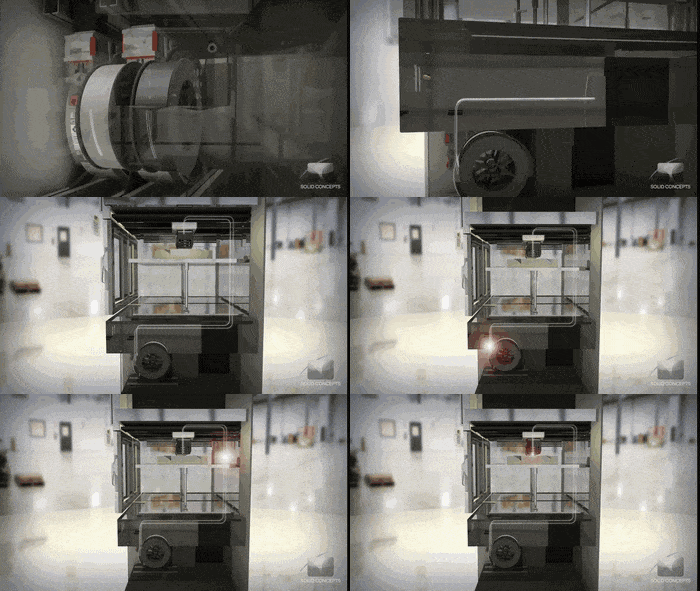
FDM 3D Filaments Extrusion Process

Step Four: Adding Melted Filaments Layer by Layer

FDM Printing Adding Materials Layer By Layer

After melted filaments get to the printing nozzle, the nozzle and printing hotbed would move in a direction that is configured in the slicing file. For a standard cartesian FDM 3D printer, the printing nozzle would move left and right along the X-axis, the printing hotbed platform would move forwarder and backward in a Y-axis, the X-axis would move up and down along the mainframe. There are also CoreXY FDM 3D printers like our SP series with auto-leveling hotbeds to increase printing stability and accuracy.
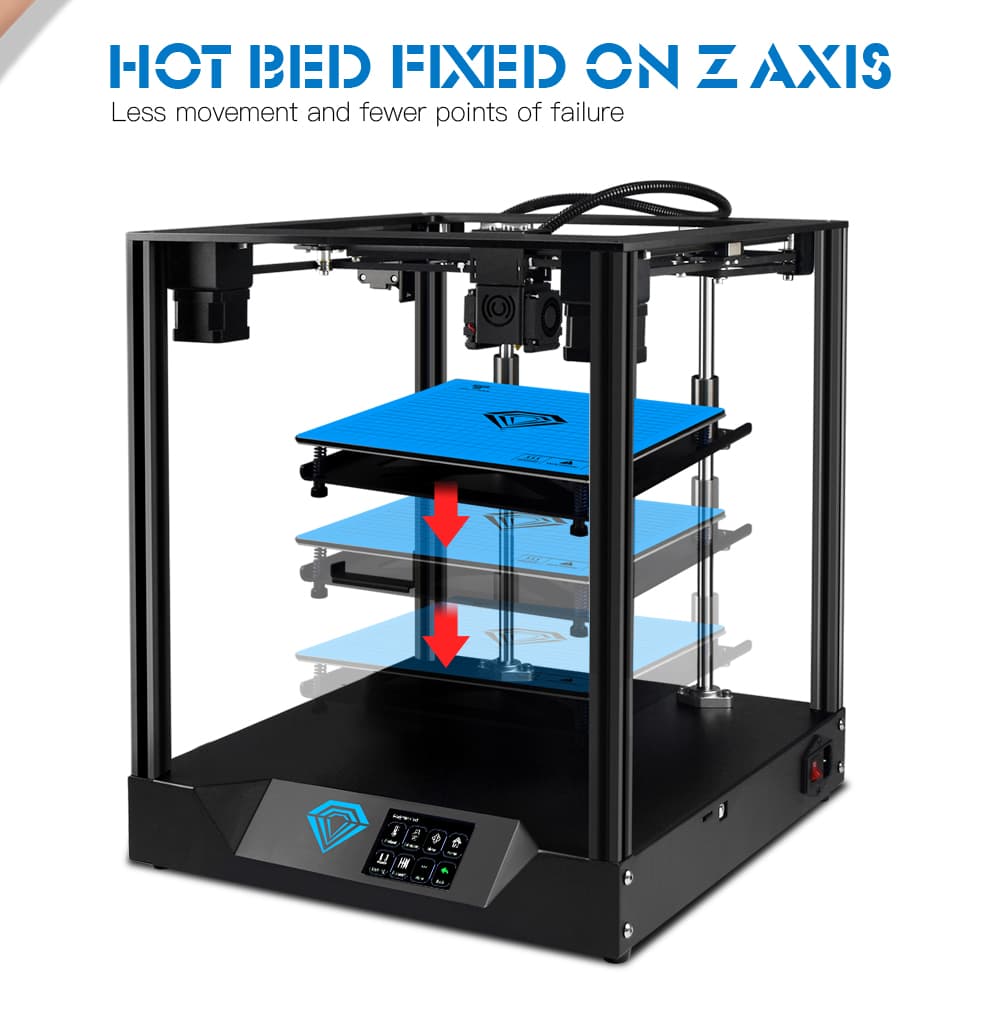
Auto Leveling 3D Printer

Step Five: Removing Supports

Supporting bridges is another important factor for getting great FDM 3D prints. As filaments are added layer by layer, if the upper layer in the design file does not have enough contacting area, the upper layer would tend to slide down before fully solidating due to gravity. Thus supporting bridges are introduced to offer extra supporting force to avoid deformation. After printing is finished, the supporting structure needs to be removed to get the designed models.

Removing Supports for Prints

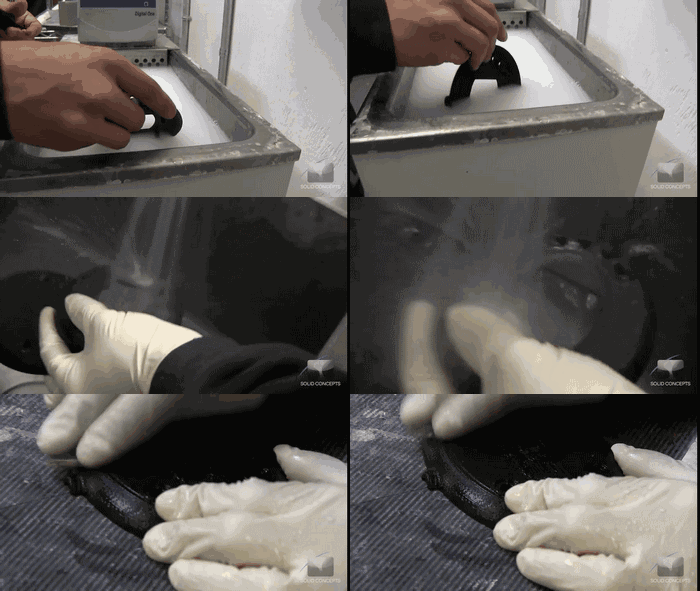
Step Six: Post-processing

Though supporting bridges be removed, there would still be some remains on the surface which would affect final results. Thus, users still need to smooth up the surface to get a decent and smooth surface for coloring.
Pro-Processing
Pro-Processing

FDM 3D Printer Materials

The material used in FDM 3D printing is filament. 3D printer filaments are usually thermoplastic materials that could be easily melted. The two most common and widely used filaments are PLA and ABS filaments. As each plastic has its unique characteristics in physical features, it’s important to choose wisely among all available filaments and set corresponding printing temperature and hotbed temperate for each material (check our post regarding best printing temperature and hotbed temperature settings for major filaments).

Conclusion

FDM 3D printer is the most popular 3D printer in the market and also a great choice for 3D printing beginners. Understanding how it works would help users quickly target possible reasons if the printer does not work properly. Getting decent prints requires some technics and tricks and if you are interested in this topic, please signup for our newsletter and stay updated with us.
Facebook
Twitter
LinkedIn
Reddit
Picture of Two trees

Two trees

Professional 3D printing and CNC laser engraving equipment manufacturer.

Latest Posts

Free Consultation

Don’t hesitate to e-mail us with any questions or inquiries, we would be happy to answer your questions.

Want to be a dealer / distributor?

Fill Out the Form to Get in Touch with Us

Something isn’t Clear?

Feel free to contact us to inquire how to become the dealer or distributor, and we will be more than happy to answer all of your questions within 24-48 hours.