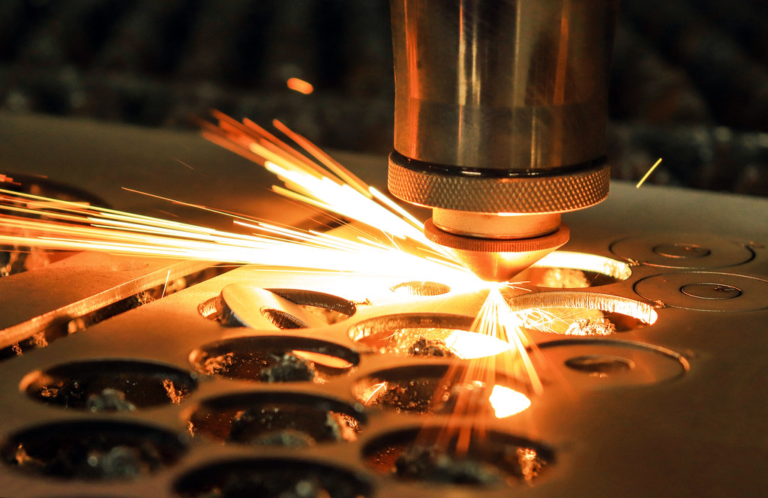
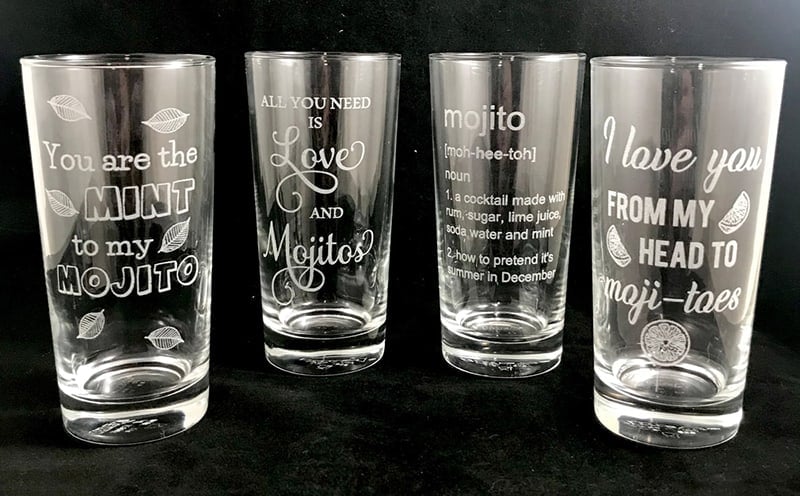
If you’re looking for an awesome gift idea to add a personal touch, look no further than laser engraving tumblers. This process allows you to etch any design, logo, or message onto the surface of your tumbler. Best of all, it’s easy to do and doesn’t require any specialized equipment. All you need is a laser engraver, accessories, and some patience.
Tools To Start Engraving Tumblers
To start your engraving, some essential tools are required: a laser engraver, colored papers or marking spray, and a rotating module. Choosing the right tools would be as same as choosing the right designs for your projects. It would always be better to spend some time on the research before rushing for a decision.
1) A Laser Engraver
A laser engraver plays a vital role in engraving tumblers. Some questions to start your research would be: how often do you engrave tumblers? What’s the minimum power needed for the machine? What are your demands for accuracy? What’s your budget for the engraving machine? The perfect combination might be a powerful engraving machine with solid quality, competitive price, and high precision. For engraving tumblers, there are many available products on the market and our new model TTS-55 is one of the best.
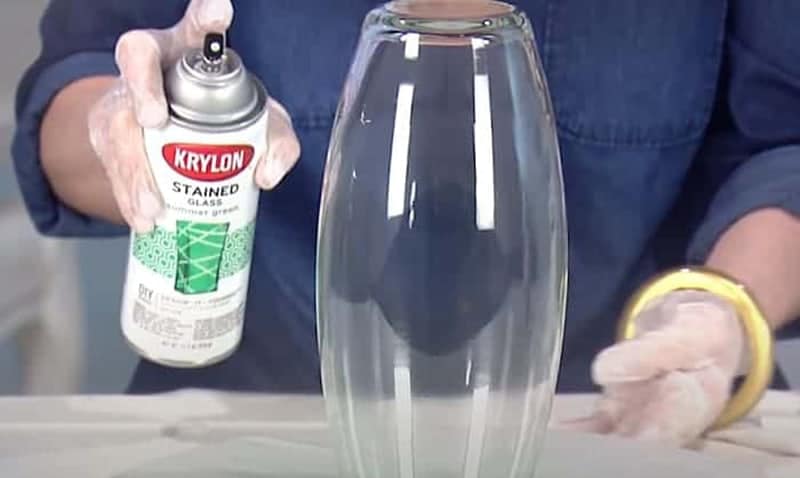
2) Colored Paper or Marking Spray
Not all tumblers could be engraved properly with normal laser engravers, especially transparent ones. But don’t worry, the problem could be solved easily with colored paper and marking spray specially designed for laser engraving. The reasoning behind it is using colored paper or coating to stop laser light from deviation and focus all light on a small spot for better engraving abilities.

3) A Rotary Roller/Rotary Attachment
Another challenge to engraving tumblers is caused by the curved design of most tumblers. A laser machine usually has a fixed focal length where the laser light gets the smallest and most powerful laser spot. The highly-focused laser spot needs to be placed on the engraving surface to get optimized results. However, when engraving curved tumblers, the distance between the light source and the engraving surface keeps changing which leads to engraving failure. That’s why you gonna need a rotary roller attachment for engraving tumblers.
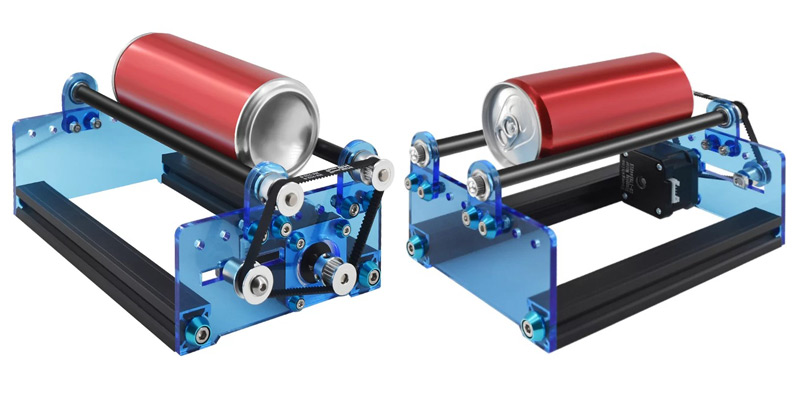
How does the rotation module work? For a laser engraver, the chipset would usually control the laser module to move in X-axis and Y-axis directions under the guidance of the design file to get perfect engraved patterns. When the rotary roller is employed, instead of moving in the Y-axis direction, the rotary roller would keep rotating the tumblers to keep the laser spot staying on the engraving surface all the way around. You might click and check more information on the rotary roller attachment for a laser engraving machine.
Preparation Work before Engraving
1) Coat The Tumblers Surface
To start, you might need to inspect the tumblers for engraving and coat the surface of the tumblers with a clear, protective plastic cover or colored paper. It is best to do this when the tumblers are clean and dry. You can also spray-paint the tumblers as well if you like. And remember darker colors would always do a better job than ones with a lighter color.
2) Run A Few Tests Before Engraving
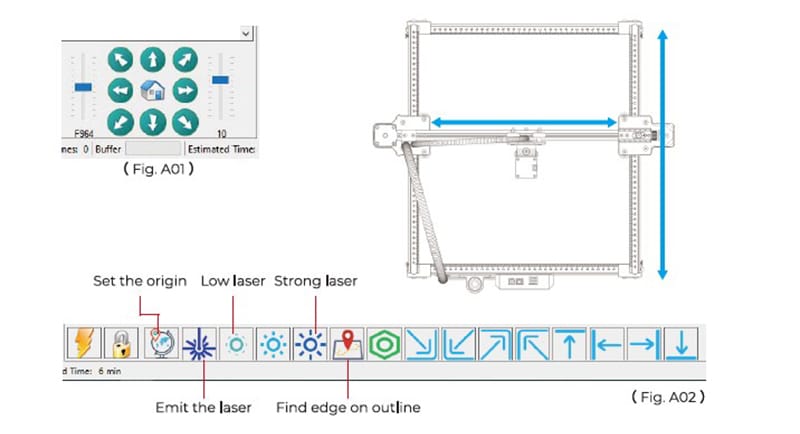
Before start working on your projects, you might need to run a few tests to make sure the laser engraving machine works properly.
- Movement Test: Control the machine and laser module to move in different directions with control buttons in software to make sure each axis is moving in the right direction at the correct speed.
- Laser Light Test: Click the laser button in the software and test if the strong light and weak light options are engraving properly.
- Engraving Test: Ran some trail tests and click as many buttons as possible to check if all functions are working correctly.
3) Test & Get the Right Settings for Laser Engraving Tumblers
It’s also highly recommended to test different settings before starting a new project. Tumblers with different thicknesses might use different power and speed settings to get perfect results. Running a few tests for different materials, thicknesses, speed & power settings would save you time and ensure you get an ideal result. And the best way to figure out how to get the correct settings for your tumbler is to find a sample piece of material, load it up in the tumbler, and run the tumbler for a test. There are also some online files that allow users to test different settings.
4) Get Design Files Plan to Engrave on Tumbler
No matter if you are engraving tumblers for your business or personal gifts, it’s really important to find the perfect images and ideas to realize your purpose of engraving. It could be an amazing image, a lovely photo, a few touching words, or some interesting graffiti. If you have no idea, there are many websites where you might find inspiration (Click to find out the top 13 laser cutting & engraving files download website. ).
| Website | Costs | File Format | File Quantity | Registration |
|---|---|---|---|---|
| https://3axis.co | Free | BMP, CDR, DXF, DWG, PDF, STL | 20,000+ | Not required |
| https://laser-templates.com | Free & Paid | AI, CDR, DXF, EPS, PDF, SVG | 5,000+ | Not required |
| https://www.thingiverse.com | Free | AI, BMP, CDR, DXF, PDF, STL, SVG | 4,000+ | Not required |
| https://www.librarylaser.com | Free & Paid | AI, CDR, DXF, PDF, SVG | 1,200+ | Required |
| https://3dsvg.com | Free & Paid | SVG | 740+ | Required |
| https://www.freepatternsarea.com/free-projects | Free | DXF, DWG, EPS, PDF, PNG, STL, SVG | 200+ | Not required |
| https://www.ponoko.com/free-laser-cutting-files-templates | Free | EPS, PDF, SVG | 200+ | Not required |
| https://www.festi.info/boxes.py/?language=en | Free | AI, DXF, G-code, PDF, PLT, PS, SVG, SVG_Ponoko | 200+ | Not required |
| https://www.vecteezy.com | Free | AI, EPS, JPG, PDF | 10,000+ | Not required |
| https://www.makerunion.com | Free | DXF | 230+ | Required |
| https://www.etsy.com | Paid | AI, CDR, DXF, EPS, PDF, SVG | 63,000+ | Not required |
| https://sofontsy.com | Paid | SVG, PSD, PNG, EPS | 100,000+ | Required |
| https://thehungryjpeg.com | Free & Paid | DXF, EPS, JPEG, PNG, SVG | 100,000+ | Required |
Some Tips Should Bear In Mind
Using a laser engraver for engraving tumblers is fairly simple, but before you get started, there are a few things to keep in mind:
1) Use darker color instead of lighter color for color coating. Colored papers and marking spray of darker color do a better job to protect laser light from deviation. If you use lighter-color papers and spray for transparent tumblers, part of the laser might get lost during transmission. In the end, the weakened laser light would fail to leave clear and deep-enough trails and images on the tumbler.
2) The glass should be free from any air bubbles that may have formed within the glass. If trapped air bubbles are present, the glass will explode during the pressurized process of engraving with our engraving machine.
3) Always wear protective eye gear when using a laser engraver. It’s common sense to wear protective google to filter out harmful light from a laser. You might find the laser machine is packed with one. Or you could buy from a local store.
4) Make sure the surface of your tumbler is clean and dry. A clear and dry surface not only makes it easier to get coated with marking spray but also gets better engraving results.
5) Keep your hands and face out of the path of the laser. The most likely skin surfaces to be exposed to the laser beam are the hands, head, or arms. Lasers can harm the skin via photochemical or thermal burns. It’s always suggested to keep them away from laser light while engraving.
Step by Step Guide on Engraving Tumblers with Laser Machine
Step One: Download design online files planned to be engraved on tumblers and save the file to a TF card.
Most regular pictures could be engraved directly without any file conversion work. You might use your favorite photos, online images, sketches, or writing some words to engrave on tumblers.
Step Two: Insert the TF card with the engraving file into your laser engraving machines.
Some laser engraving machines support operation directly from a computer, mobile phone APPs, or a single TF card. If you prefer using your PC for engraving, you can import image file direct form your file directory.
Step Three: Connect the Rotary Roller Attachment with Your Laser Machine
Following is step-by-step guidance on how to connect the rotary roller attachment to a laser machine.

Step Four: Install All Required Software and Drives.
To run the laser engraver machines, users gonna need to install some software before operation.
- CH340SER.exe: The executive software to allow your computer to connect with your laser engraver machine and control the machine with web applications.
- LaserRGBL: An open-source free software to operate the laser engraver, works for Windows system only.
- LightBurn: A Paid software with extra features and functions to operate the laser engraving machine, and support windows, Mac OS, and Linux systems.
Step Five: Turn On The Laser Machine & Import Configuration Files & Settings
After installation of all required files, it’s time to turn on the machine to import recommended configuration and settings. We have included a setting file in the TF card in which users could import all default recommended settings with a few clicks. The setting file would be in .nc file format.

Step Six: Laser Focal Length Calibration
Each laser engraving machine gets its own focal length. Taking TTS-55 for example, its focal length is 23mm which means when the distance between the laser light source and the engraved surface is 23mm, the laser engraving machine would get the smallest and most powerful laser spot and the best engraving result. To achieve optimized results, users need to rotate the know switch on the top of the laser module to adjust the focal length to 23mm. This sounds like a quite complicated process. However, with the assistance of the fixed-length column, it can be easily done by adjusting the distance to the same as the full height of the column.
Step Seven: Run Engraving Tests & Calibrate Settings
After focal length calibration, it’s time to run a few engraving tests to check if the movement and laser light is working properly. You might find some errors or unsatisfied results during the process and need to adjust some settings before everything works smoothly. To save more time on calibrating, you might use some sample tumblers with similar thickness and size to the tumblers you plan to engrave.
Step Eight: Start Engraving Tumblers
After settings are calibrated correctly, now you could start engraving the tumblers. Remember to wear protective goggles while engraving tumblers. It’s also recommended to remain present during the whole process.
Step Nine: Post Processing
Just like any other handcraft, there are still lots of work to do after engraving is done. As we mentioned above, since we used colored paper or marking spray for tumbler coating, we need to remove all coatings and remove the veil of engraving patterns and images. Depending on the different materials used on coating, you might need some anti-corrosion detergent and some dry cloth to complete the job. And there is one misunderstanding of color coating that some think the engraving patterns would be in the same color as the paper or spray color. In fact, the colored paper and marking spray is only used to block laser light from deviation and has no effect on the engraving colors. Engraving is only a process of removing the coating or surface of the engraved object and would not cause any color change in the material.
