With 3D printing becoming more affordable and accessible, it is slowly but surely gaining a large user base. People are designing different 3D models and printing them for themselves, their loved ones, or even their own businesses. But creating 3D models yourself can prove to be complicated.
That is what we are here to help you with, giving you some helpful 3D printing design tips & tricks to help you. Considering the vast amount of information about 3D printing and designing on the internet, it can become overwhelming. That is why we prepared a list of the top 15 3D printing design tips you will ever need.
3D Printing Design Tips And Tricks
These tips and tricks will help you design the perfect 3D model to print out. And making the whole process more straightforward and improving your end design.
1st Tip: Anchor To Avoid Supports
One of the essential 3D printer design tips is to try and incorporate ways to avoid the use of supports. The printer uses supports when printing overhanging designs. However, they waste a great deal of filament making these supports.
Thus, users have developed various methods to support their models. One such way is using anchors to provide the needed support. These can either be hidden or act as additional model features, getting rid of the overhang without ruining the whole design.
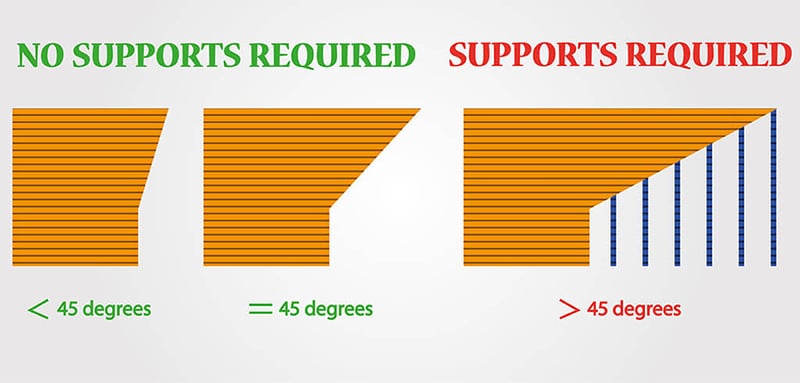
2nd Tip: The 45-Degree Rule
Another one of the 3d printing design basics is using the 45-degree rules. According to the 45-degree rule, as long as the overhang is 45-degrees or less, supports are unnecessary. However, this 45-degree angle is very close to the limits of your filament. So, I would recommend keeping the incline at a 30-degree angle instead.
3rd Tip: Bridge And Droop
Bridges are self-explanatory; they are horizontal structures without any supports but connected to other objects at their ends. Something that can happen with bridges is that they can collapse in on themselves due to their weight. As a result, you may want to design support for them. This is one of the most important 3d printing design considerations.
Another issue that you will notice in bridges that you have designed is drooping. It is a sag created in the middle of the bridge due to the weight of the filaments. Drooping is most common on bridges less than 36 mm in height, where it can lower by nearly 0.5mm. This drooping can increase to up to 5mm for bridges longer than 60mm.
4th Tip: Strength Based On Orientation
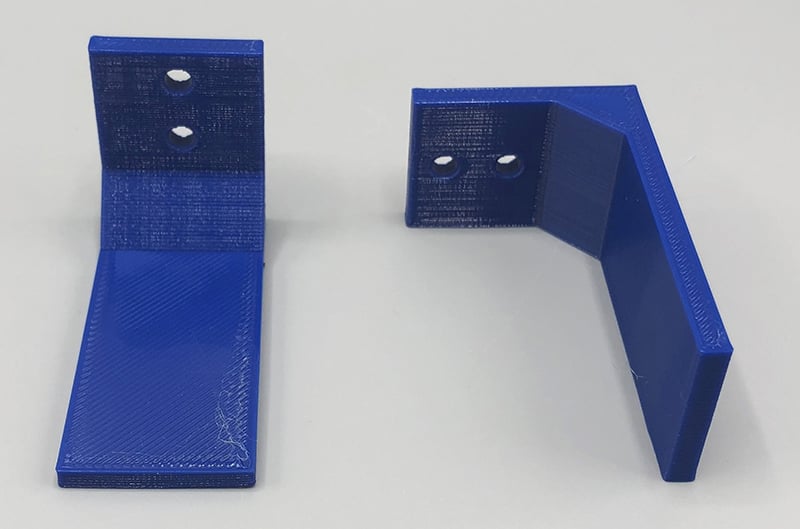
If you are designing something to hold a significant amount of load, you should be aware of the orientation of your model. An FDM 3d printing tip is that for FDM printers, you will notice visible layer lines. These lines are the weakest point of the printed model. Thus, when designing a model that can handle stress, make sure the force is applied perpendicular to the layer lines. Following is a shelf bracket printed in two different orientations and the right one would for sure hold more weight.
5th: Splitting The Model Up
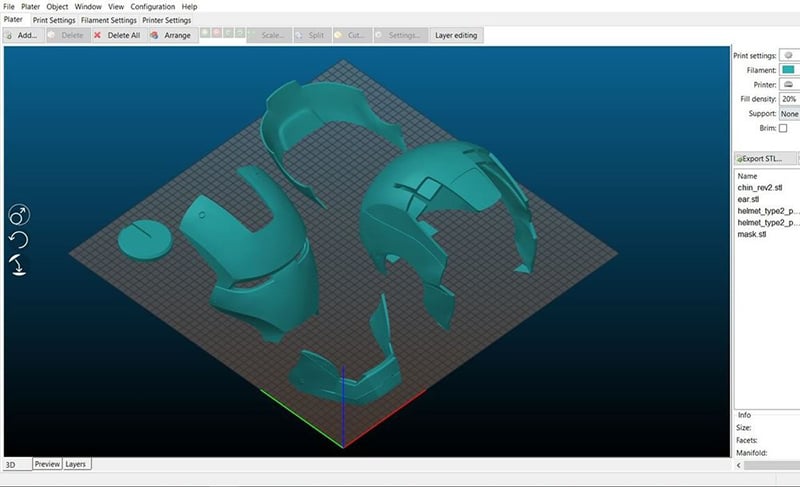
When designing a 3D print, a trick that can help new 3D printing enthusiasts is splitting their models into two or more parts. It allows you to print much larger projects and maintain the overall quality. Software like Cura, Meshmixer, Blender, and Fusion 360 makes splitting the model easier.
6th Tip: Orienting For Details
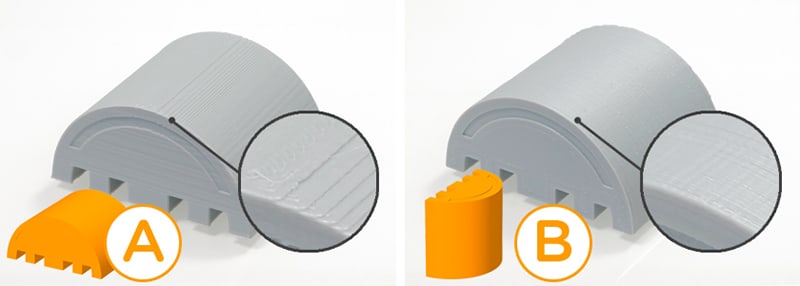
If your design has very fine details, you should consider its orientation before printing it out. You need to orient elements of your design along the Z-axis. Even though you can rotate the design along any axis, the resolution is not the same along these axes. You can control the resolution along the Z-axis by adjusting the thickness setting on the layers. Thus, making it the best axis to print detailed work on. The following part is the same design but A is printed horizontally and B is printed vertically. Though both are of visible layer lines, B is of much more pleasant result.
7th Tip: Preventing Overheating
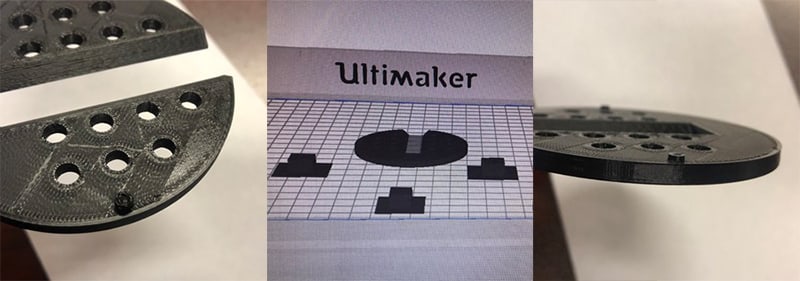
Another common problem that most projects face is overheating. It usually takes place near the narrow parts of your design. As a result, you can try to disperse the heat by printing a thin tower of the same height away from the original design. It gives time for the actual point to cool off before the hot tip returns to continue to project. However, this will leave you with another tower created solely to prevent overheating. Check this forum thread and find out how the extra towers are used to solve 3D printing overheating problem.
8th Tip: The Design Should Suit The Material
When designing anything, you should consider the material you will be using. When designing something where the end product needs to interlock with another part, you should note how much the filament can contract after cooling. Or, for mechanical pieces, take the flexibility and sturdiness of the material into account when designing.
9th Tip: Prevent Warping With Curved Edges
Due to overheating, warping can also take place, and you can take some design steps to solve this warping issue. A common method is to use rounded edges instead of pointed corners. It disperses the heat and prevents the model from warping in on itself when printed.
10th Tip: Prevent Warping With Mouse Ears
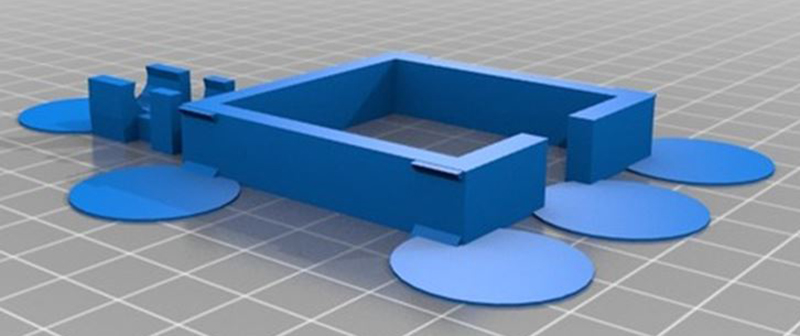
Other than curved edges, another design tip to avoid your project warping in on itself is mouse ears. They are small discs that you can find at the corners of the base model layer. As a result, you can increase the surface contact area between the print bed and model corner. As a result, it will not warp in on itself.
11th Tip: Know Your Printer Limits
Before you start designing your model, you need to be aware of the limitations of your printer. 3D printers are much more flexible than other processes when it comes to the manufacturing process. But, it still has its limitations, and any good designer should be aware of these before moving to the design phase.
12th Tip: Detailing With 3D Printers
Printing out detailed work with a 3D printer can be very difficult with the size of the available nozzles. Furthermore, the filaments used in the printing process may expand or contract as they cool, ruining some details. Thus, we recommend against putting extra details in your design as it may just get lost by the end of the printing process.
13th Tip: Fit Tolerance
When creating a model for something with multiple interlocking portions, be mindful of the fit tolerance in the designing phase. We recommend using 0.4mm for loss fittings and a 0.2mm offset for a tight fit. This is one of the most important 3D printing design guidelines. However, you should test it yourself if you want to get the perfect fit for your model.
14th Tip: Watertightness
When designing a model for a 3D print, make sure your model is watertight. It means that your corners should connect to 2 polygons, and there cannot be any holes in the model. However, if your model is not entirely watertight, it can result in the 3D printing software misinterpreting it, causing errors that can lead to holes or inconsistent layers.
15th Tip: SLT Export
SLT is the preferred file format for most 3D printers; this file format reproduces your design in the form of triangles. And the higher the poly count is, the more details. However, this leads to large file sizes that not all 3D printers can handle. As a result, choose your SLT export setting to match your 3D printer. The standard length of these files ranges from 200 kb to 10 MB.
Conclusion
This article talked about some 3D print design tips and tricks that can come in handy. These tips will take designs to a whole new level and make printing much easier. We hope you enjoyed this article. Thank you and good luck.
